Installing the Arc Feather 250W DIY Electric Bike Kit
I recently installed the Arc Feather electric bike kit on my bicycle and I wanted to share some observations and tips on the process. My bike is an Avanti Giro F 2 women’s road bike in size small.

In the box are the e-wheel, a pouch containing the battery and controller, the pedal assistance sensor and magnet ring, the handlebar display and the optional throttle (which I haven’t mounted). I also ordered the universal torque arm, which is recommended to prevent damage to the bike’s front forks. This came in the same box.

The first challenge was that the axle of the e-wheel was 10mm and the dropouts on my bike were only 9mm. Using a half round bastard file, I filed the dropouts to fit the larger axle. In retrospect, a 10mm drill bit might have achieved this a bit more easily and with a slightly nicer shape.

In an ideal scenario, your existing dropouts would be the same size as the axle. There was enough material in the fork that I was able to file out the dropouts without compromising the safety and strength of the dropout, making sure to take it out of the thicker side at the back. If I’d needed to remove more than 1mm it probably wouldn’t have been suitable.

The kit doesn’t come with a tyre and tube. If your old wheel has the same dimensions as the e-wheel, you’ll be able to remove and re-fit your old tyre and tube. I needed to purchase new ones because my old wheel has a narrower rim and a Presta valve rather than a Schrader valve. The e-wheel does come with rim tape, but I had the guy at the bike shop put some stronger rim tape on.
Once your dropouts are ready and your tyre and tube are in place, you can fit the e-wheel. Notably, the user guide doesn’t tell you which way the wheel should go on. If you hold up the battery pack in front of the bike as if you were going to affix it to the handlebars, you’ll see the cable connector for the hub motor coming out on the right side. The cable connector on the e-wheel should be on the same side. If you put the e-wheel on in the wrong direction, it will spin in the wrong direction.

There are some c washers included to use for spacing on the axle. They are just loose in the box so you might find them stuck to the magnet ring.

I don’t have disc brakes on my bike, so I don’t have any guidance to offer about installing an e-wheel on a bike with disc brakes. I did need to adjust my caliper brakes to accommodate the slightly wider rim of the e-wheel.
In Australia, an electric bicycle with a 250W motor can only be considered a bicycle (and so allowed to be ridden wherever you would ride a bicycle) if the motor is activated by a pedal assist system. The magnet ring is attached to the crank shaft and rotates when you pedal. This rotation is sensed by the pedal assistance sensor, which causes the motor to activate.

The magnet ring can be split into two pieces so you don’t need to take the crank arm off the bicycle. There’s a metal circlip to hold it together, which I was able to attach with my hands (with a little struggle). The included zip ties for attaching the pedal assistance sensor were a bit soft and weren’t holding the sensor firmly so I replaced them with higher quality ones. If the sensor moves so it isn’t close enough to the magnets, the motor will not activate.
The display and the battery pack are mounted on the handlebars. I don’t have a lot of free space on my handlebars so I had to move my bell and reflector around to make room. The display also obscures my front gear indicator, but I find it’s pretty obvious what front gear I’m in just from the resistance I feel when pedaling, so I don’t consider that a great loss.

Plugging in all the cables is simple because all the connectors are colour coded. The cables are quite long, which might be good if you had a much larger bike or wanted to mount your battery pack somewhere other than the handlebars. There was a bit of work in tidying up the cables and fastening them in place.
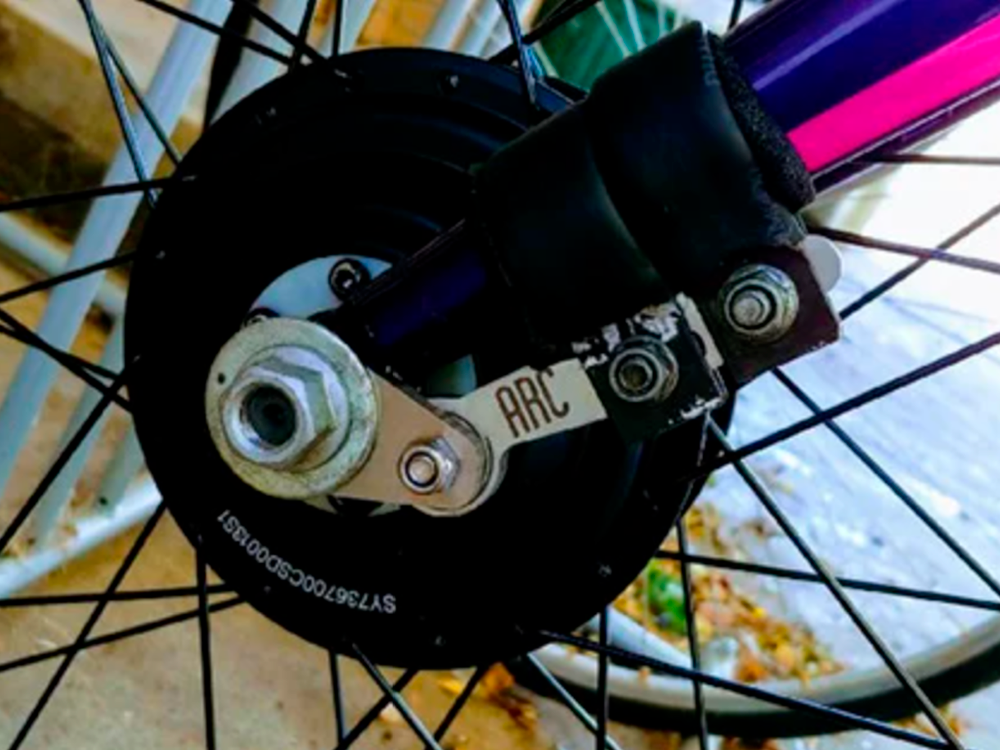
The installation manual for the torque arm is available here. I wasn’t really happy with the hoseclamp they supplied to attach it to the front fork. It seemed like a weak fixture and I also thought it would scratch the paint. I went to Bunnings and got some clip heads to affix the torque arm properly.

I put some K-Flex elastomeric insulation (also from Bunnings) under the clip heads to protect the paintwork. I covered them in shrink wrap for water resistance and a nicer surface.

I was a little bit apprehensive about riding the bike for the first time. I was worried that I wouldn’t like the speed and I would feel less safe. Once I actually got on the bike, that worry disappeared. I actually feel safer, even riding near traffic, knowing that I can quickly get myself out of a bad situation. Riding up hills is effortless, and it is actually pretty fun to go fast. I haven’t really tested it out enough yet to comment on the range but I rode it for about 7km and it didn’t seem to consume much of the battery.
Prior to the conversion, my bike was quite light. It is heavier now at the front, because of the motor and battery pack. This is not really a problem while riding, but it is something to consider if you ever have to carry your bike.
Although there were some tricky parts, the conversion was not too difficult. However, if you think this project is not for you, some bicycle shops will do the conversion for you.